")
")
")

SwitchedOnToys – DIY Aerial Orbit – Satellite Model
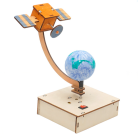
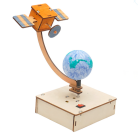
Creating a model of an aeronautical orbital satellite is an engaging educational project that provides a hands-on experience in satellite design and space exploration.
SwitchedOnToys – DIY Aerial Orbit – Satellite Model : Creating a model of an aeronautical orbital satellite is an engaging educational project that provides a hands-on experience in satellite design and space exploration. This easy-to-assemble kit is perfect for STEM learning, allowing you to explore the principles of satellite functionality and its role in modern technology.
Materials Needed:
-
Cardboard or Foam Board: For the main body of the satellite.
-
Plastic Straws or Skewers: For the satellite’s antennae and solar panels.
-
Aluminium Foil: To give the model a metallic appearance.
-
Glue or Tape: To assemble the parts.
-
Scissors or Craft Knife: To cut the materials.
-
Markers or Paint: To add details to your model.
-
String or Thread: To hang the satellite model.
Step-by-Step Instructions:
-
Cut a rectangular piece of cardboard or foam board to represent the main body of the satellite. A size of 4×6 inches works well as a starting point.
- Cover the cardboard with aluminium foil to simulate the satellite’s metallic surface.
Create the Solar Panels:
-
Cut two smaller rectangular pieces of cardboard or foam board for the solar panels, approximately 2×4 inches each.
-
Cover these pieces with aluminium foil.
-
Attach the solar panels to the sides of the main body using glue or tape and use plastic straws or skewers as support arms to extend the panels outward.
Add the Antennae:
-
Use plastic straws or skewers to create antennae. Cut them to your desired length.
-
Attach the antennae to the top and bottom of the main body with glue or tape. Enhance the details by wrapping parts of the antennae with aluminium foil or painting them.
Detailing the Satellite:
-
Use markers or paint to add details such as the satellite’s name, country flag, or other markings. You can also include features like sensors or cameras for added realism.
Hanging the Satellite:
-
Attach a piece of string or thread to the top of the satellite to simulate its orbit in space.
Final Touches:
-
Inspect your model and make any necessary adjustments. Ensure all parts are securely attached for a sturdy finish.
Understanding the Model:
-
Main Body: Represents the satellite’s housing, where most equipment and instruments are stored.
-
Solar Panels: Provide power by converting sunlight into electricity, crucial for the satellite’s operation.
-
Antennae: Used for communication with ground stations on Earth, essential for transmitting and receiving data.
-
Sensors and Instruments: Depending on its purpose, the satellite may include various sensors for weather monitoring, scientific research, or communication.
This model is not only a fun project but also a practical educational tool that illustrates the fundamentals of satellite design and space technology, reinforcing key concepts in STEM learning and sustainable living.
| Weight | 0.13 kg |
|---|---|
| Dimensions | 24 × 6 × 18 cm |
1 review for SwitchedOnToys – DIY Aerial Orbit – Satellite Model
5.00 out of 5 stars
Add a review
Related products
-
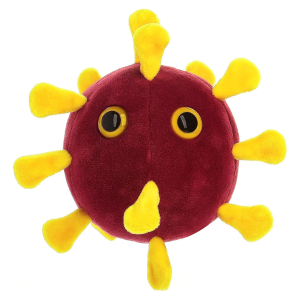
Giant Microbe | Coronavirus COVID-19 (SARS-CoV-2)
Original price was: $34.95.$31.95Current price is: $31.95.

")


 Heebie Jeebies Stethoscope
Isla –
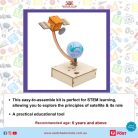
Build your own space station! This model helps kids understand how satellites stay in orbit around our planet Earth.